Overview
This article is meant to inform the user on how to install PrintNode.
Precedents
There are two parties involved in this document: Trident 1 onboarding personnel and customer. This article assumes that the customer has properly installed the printers on their computer.
Process
ONB: Log into PrintNode
1. Onboarding should visit https://www.printnode.com/
2. Click Login at the top right
...
3. Enter your User Credentials
4. Click Login
...
ONB: Adding a Child Account
1. Click Integrators on the left-hand side
...
2. Create a child account by filling in the middle section
a. Email - the main email to the POB
b. First Name - first name of the technical POC
c. Last Name - last name of the technical POC
d. Password - create a default password for them to log in to PrintNode
e. Creator Reference - an account nickname for easier visibility
3. Click Create
...
CX: Install the Client
Customer:
1. Visit https://www.printnode.com/en
2. Click Login
3. Enter your User Credentials
4. Click Sign In
5. Click Downloads on the left-hand side
6. Download the version compatible with your OS
7. Follow the prompts to complete installation
8. Log into the Print Node through the Application Pop
9. Do this on all the clients that have printers connected
ONB: Generate API Key
Onboarding:
1. Log into the PrintNode account
2. Click Act as Child Account at the bottom left-hand side
...
3. Click Act as Child Account corresponding to the recently created location
...
4. Click API Keys at the top right of the page
...
5. Put in an easy identifier in the Create New API Key description field
6. Click Create
...
4. Copy the API Key generated and keep it in a safe place
ONB: Connect PrintNode to Trident1
Onboarding:
1. Visit the Location’s Trident1 portal
2. Hover the mouse over the Personal & Admin menu
3. Then hover over Settings
4. Click Printing Options
...
5. Scroll down to the PrintNode section
6. Click the checkbox to switch PrintNode to ‘ON’
7. Paste the above API Key in the field
8. The PrintNode account/email is defaulted to ours since theirs is a Child
...
Add Printer to Location
Within the Printing Options
1. Click Add Printer by Location
...
2. Click the drop-down for the Location
Click the drop-down for the Location
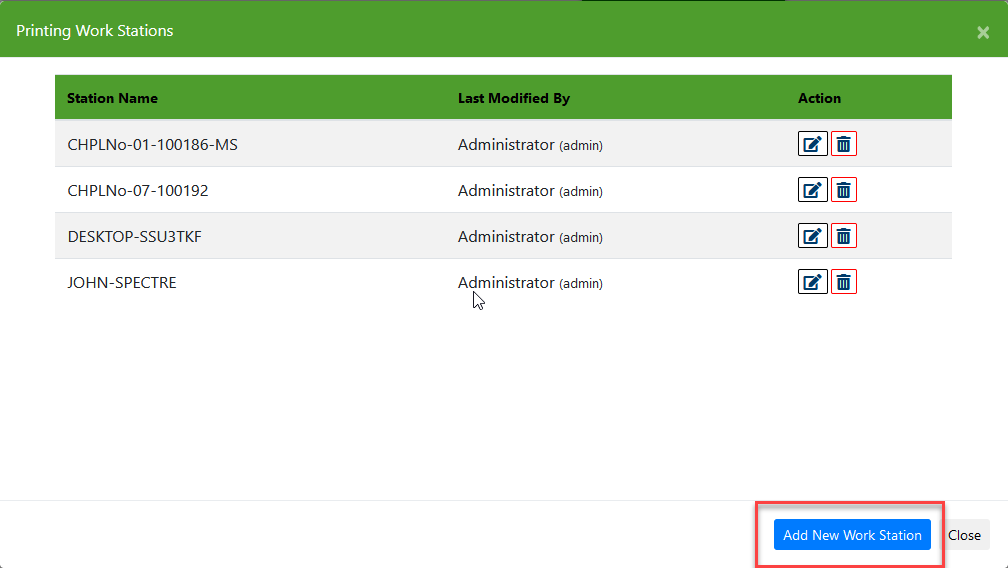
3. Add Workstation
Click Manage Printing Work Station
Click ‘Add New Work Station’
If the latest version of QZ Tray is installed, then you’re Workstation name should automatically populate
Note: If Workstation does not auto-populate, uninstall QZ Tray and Re-install the latest version.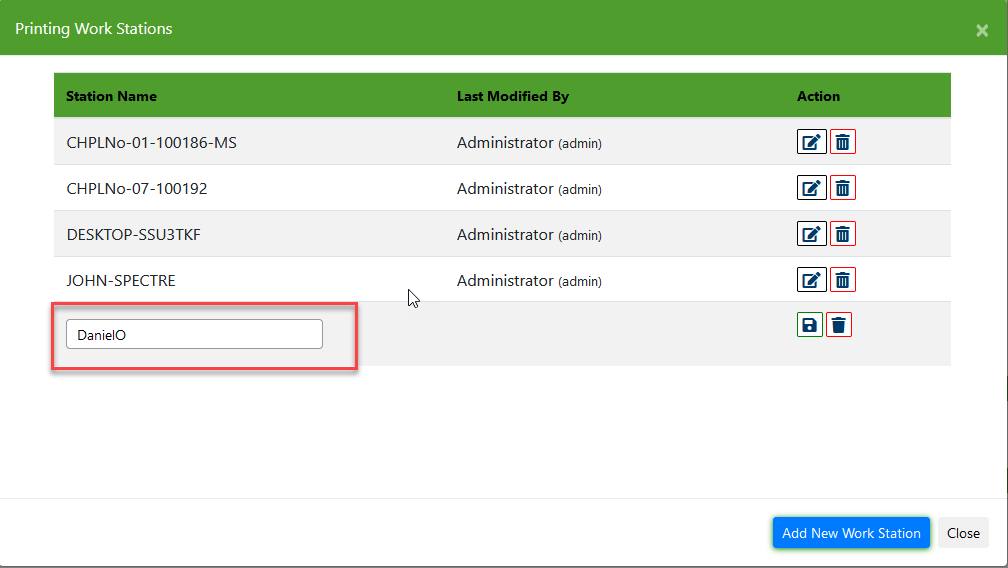
Click the ‘Floppy Disk’ button to save
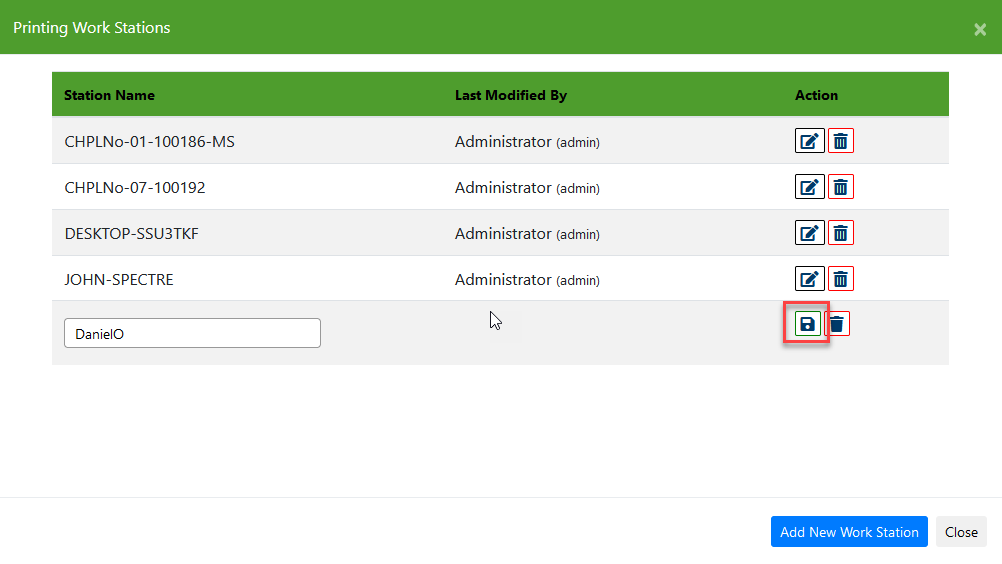
Click Close
4. Click Get List of PrintNode Printers
...
5. Click OK that you would like to get list of PrintNode printers
...
6. Click the drop-down to select the printer that you would like to save to Trident1
7. Select the Printer Type:
Letter Printer - Your normal 8 1/2 x 11 full size printer
Receipt Printer - Printer used to print receipts
Label Printer - Printer used to print labels
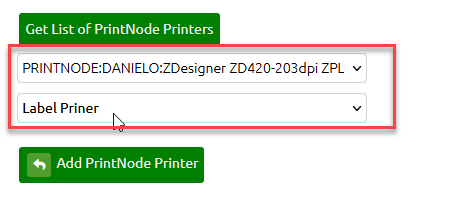
8. Click Add PrintNode Printer
...
9. You will then receive a confirmation that the ‘New Printer Added Successfully’
...
10. Click the Module that you would like to map the printer to
11. Select the Printer that you would like to map to the Module
12. Click Save Printer Map
...
The Printer is now successfully added to the system!
...
...